
Wireshark packet analysis (basic)
To demonstrate this, I will be analyzing a pcap from bicWC. You can also download this pcap and follow along » here.
You can also download this » here. I will use this pcap to demonstrate how to extract files from captured network traffic.
DEMO 1
How many packets have been captured?
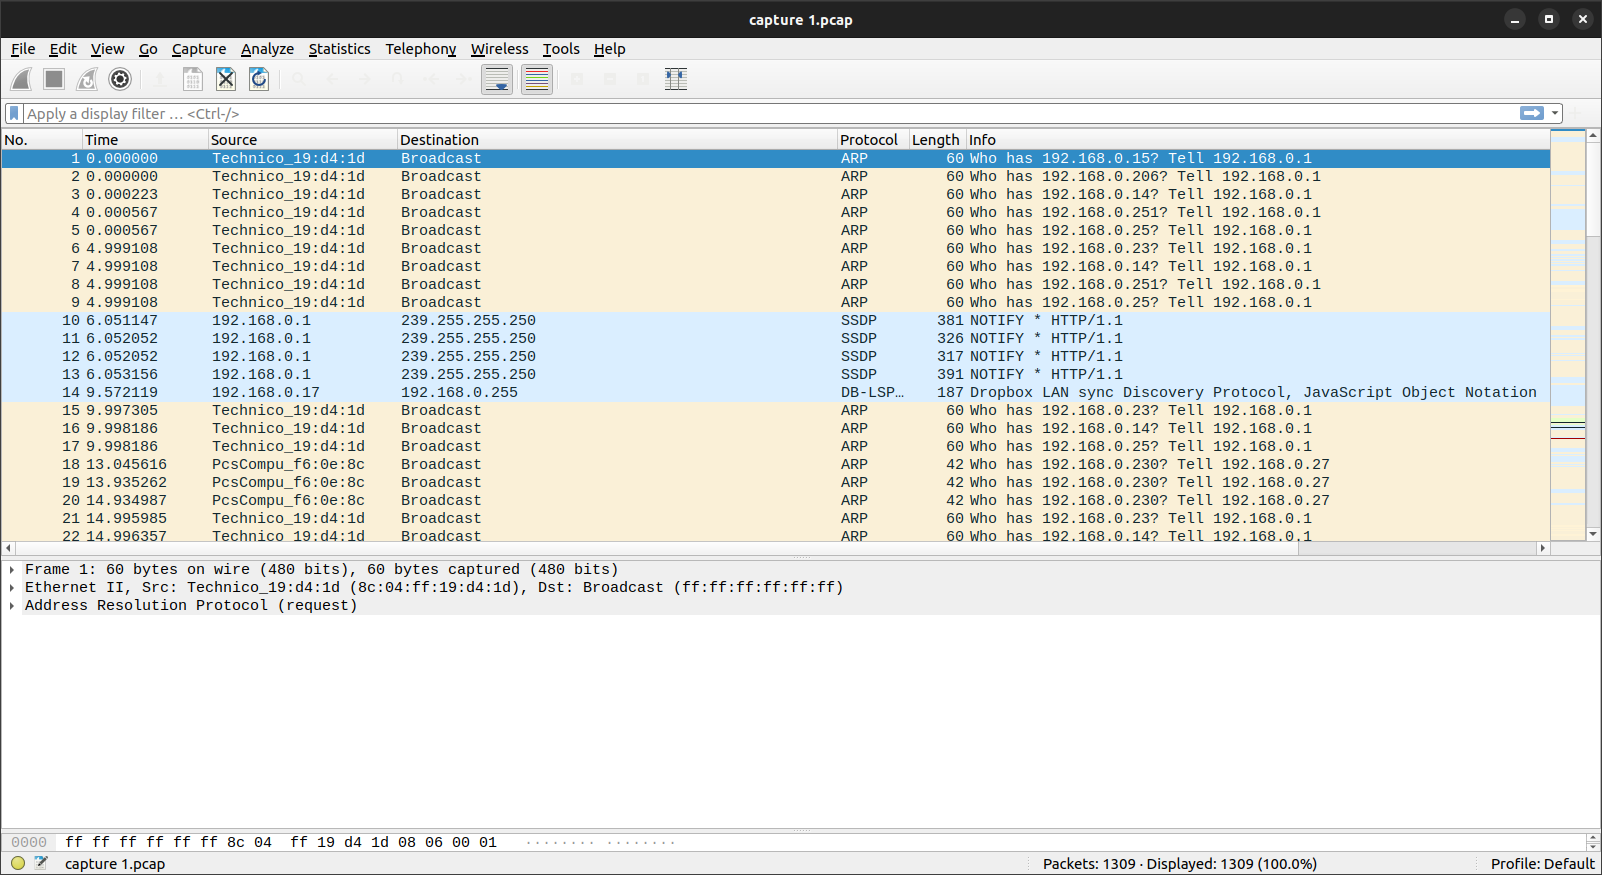
The number of packets is shown at the right bottom of the screenshot above: 1309
What is the IP address of the attacker?
Here we will use the TCP filter in Wireshark as shown below:
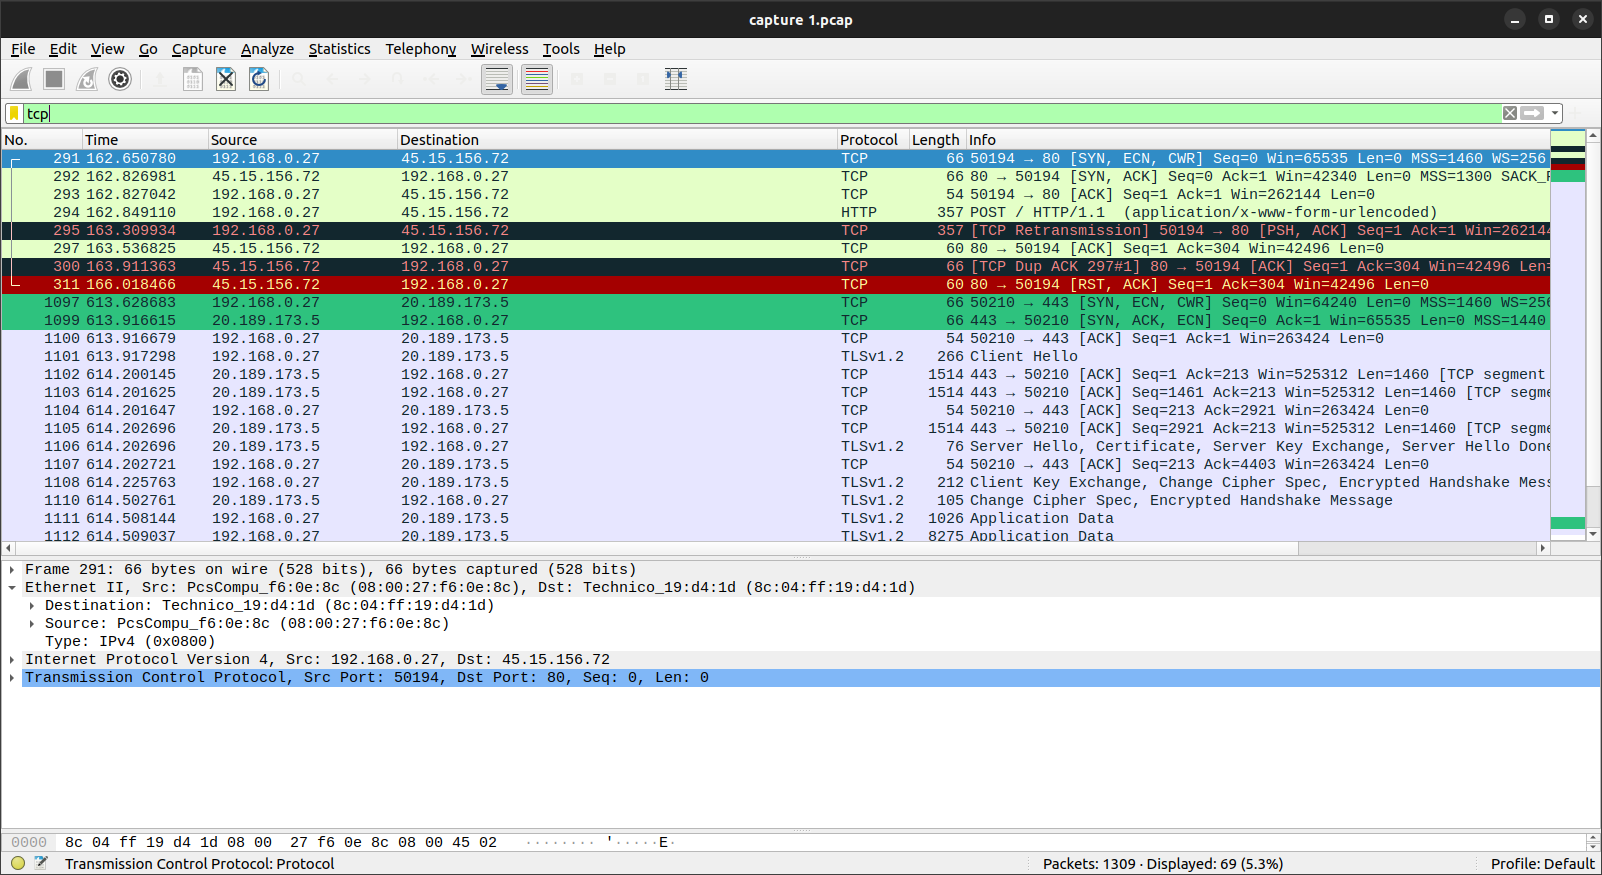
The IP address is 45.15.156.72
Which city is the IP address based in?
We will use an online IP locator tool:
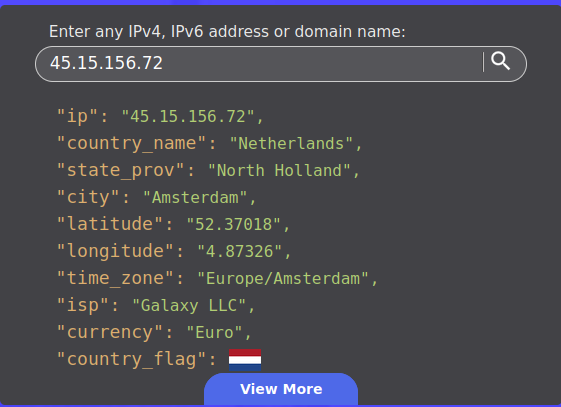
The city is Amsterdam
How many DNS servers are in the pcap?
Here we just use the DNS filter in Wireshark:
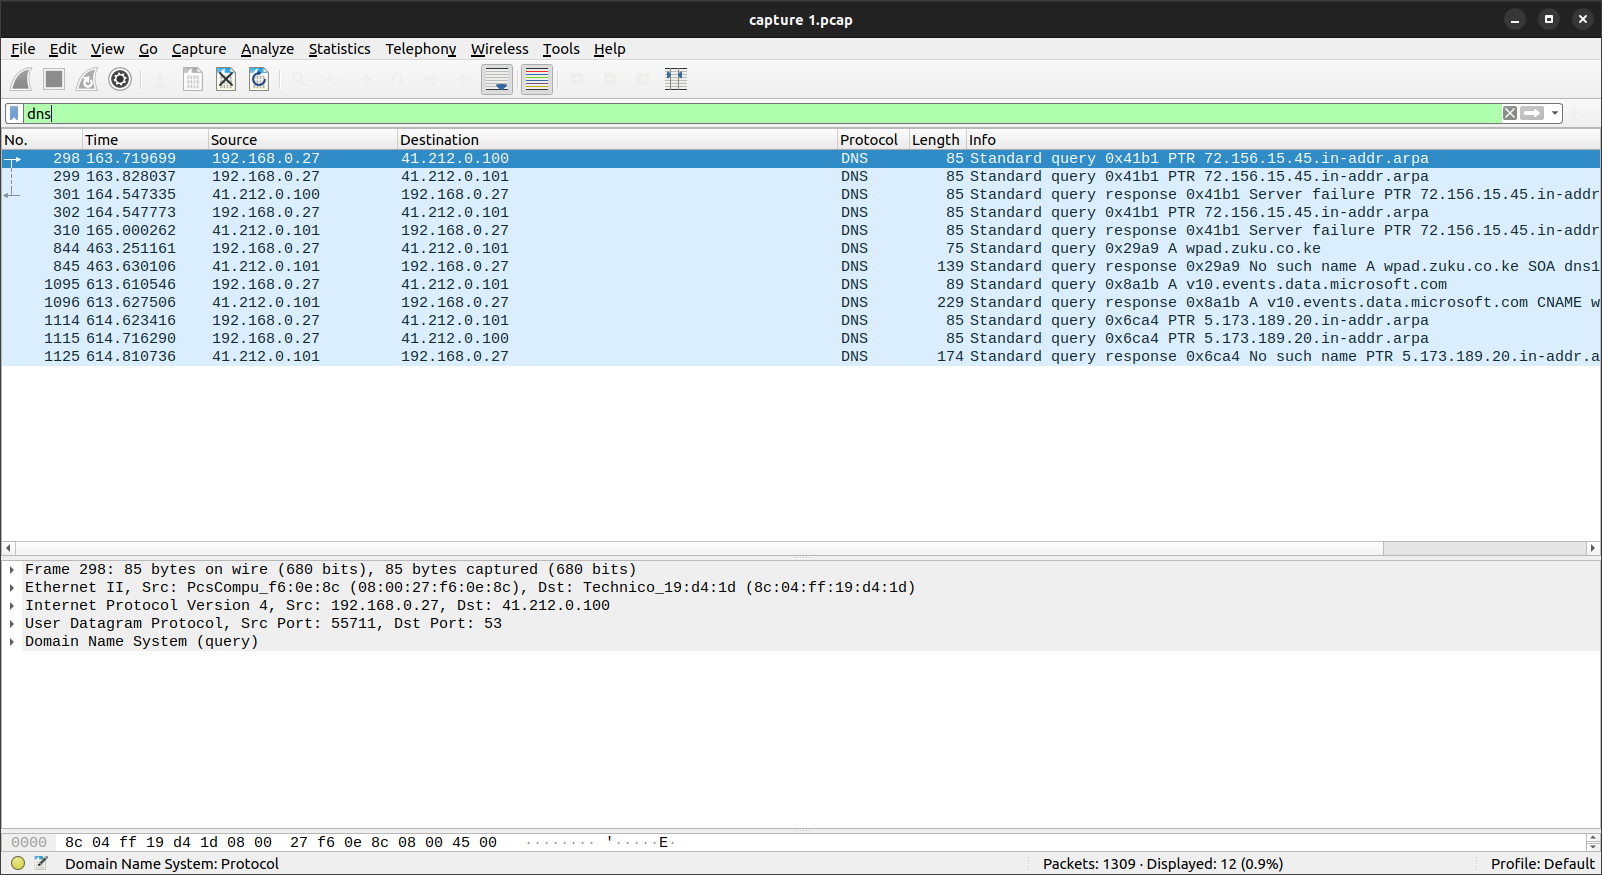
The answer is two. There is one with IP xxx.100 and xxx.101
What is the IP of the NTP server?
Here we will use the NTP filter in Wireshark:
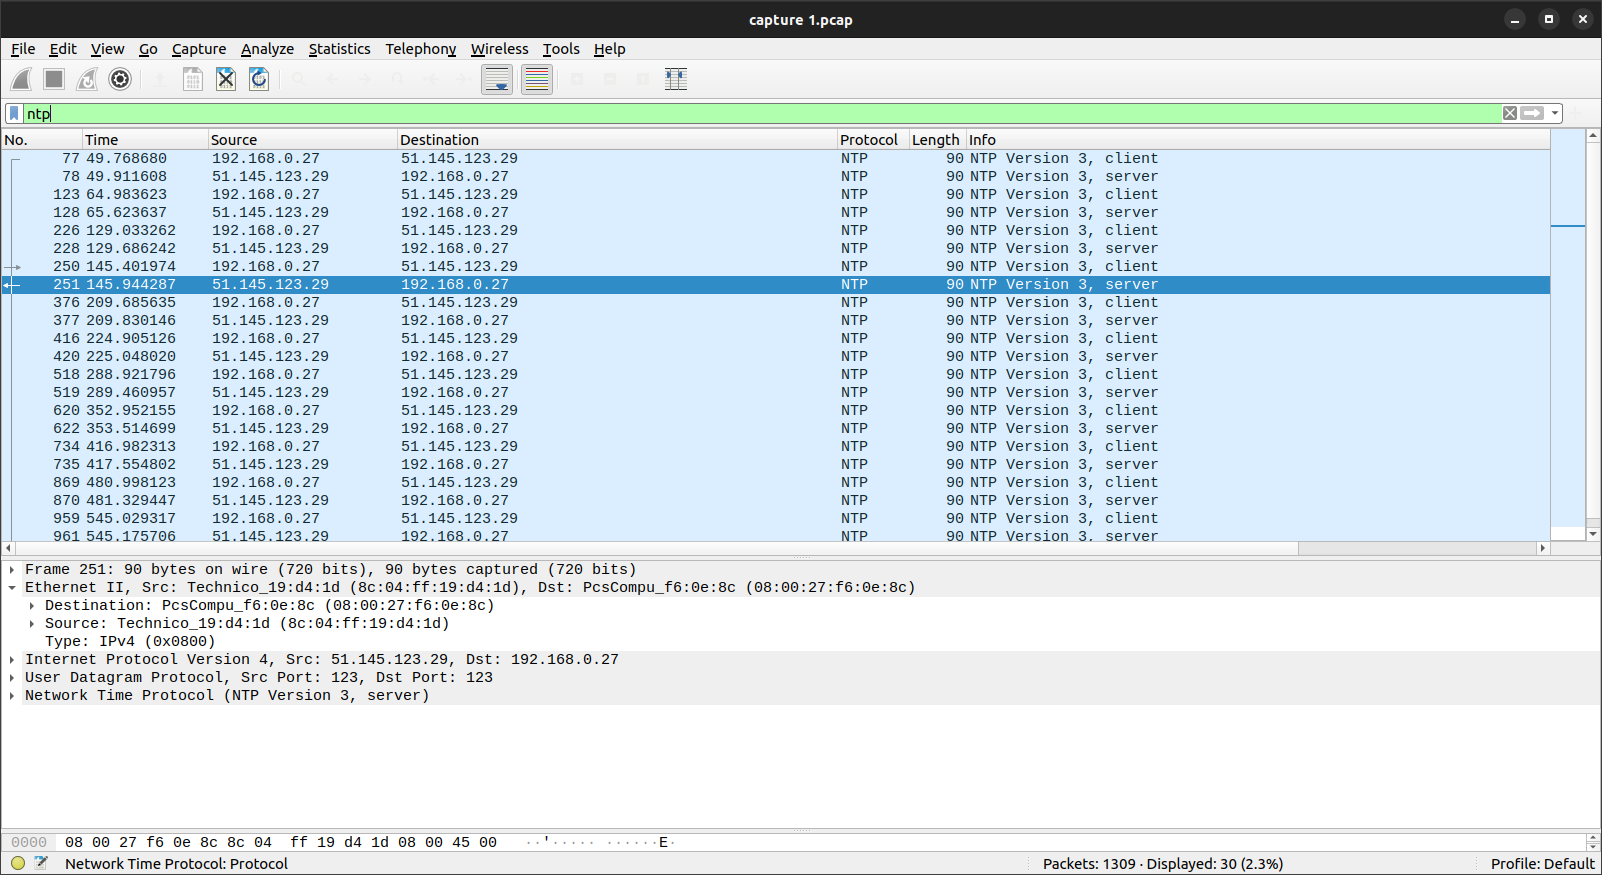
The IP address, as you can see above, is 51.145.123.29
What machine ID was transmitted to the attacker?
Here we will follow the TCP stream of one of the requests to the attacker as shown below. This time we will use the IP address filter <ip.addr == 45.15.156.72>:
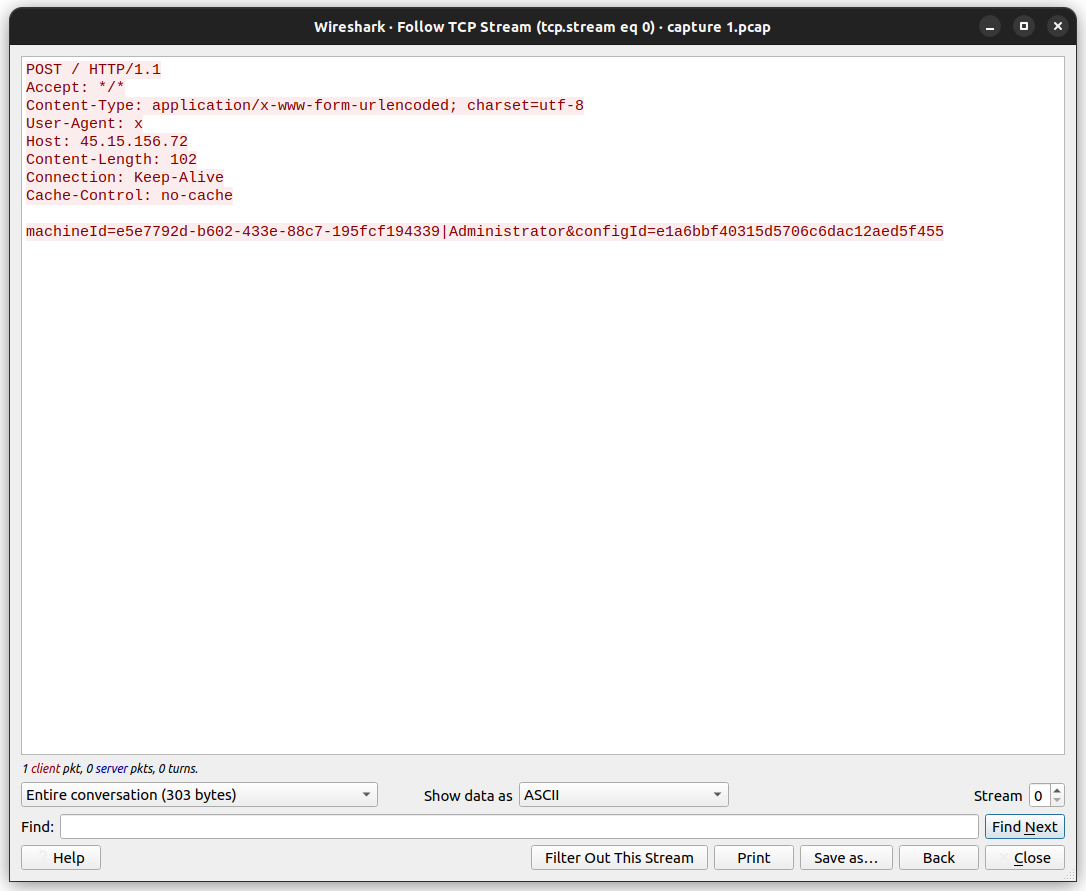
The machine ID is a parameter of the POST request.
What is the user-agent?
As you can see from the picture above, the user-agent is “x”
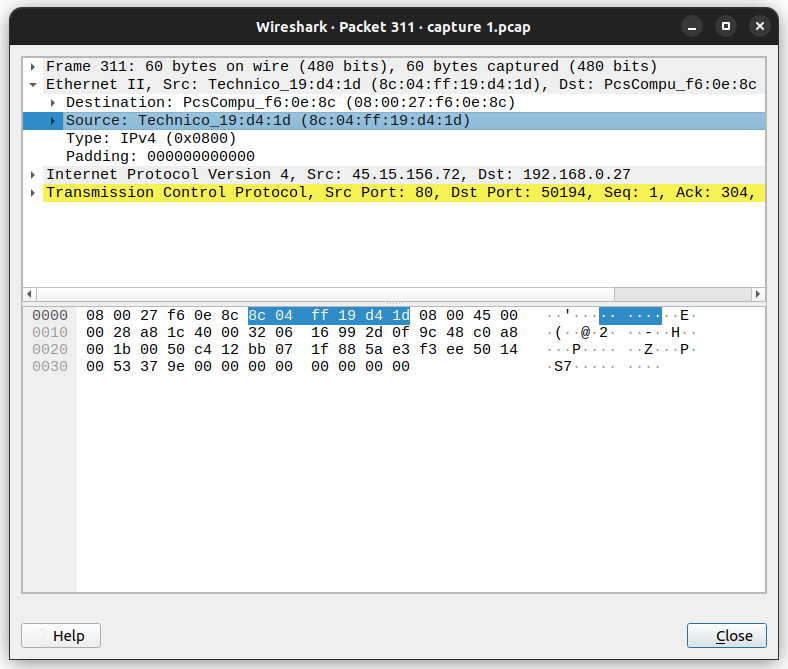
What was the MAC address of the compromised machine?
We just have to double click on one of the TCP packets between the attacker and compromised machine as shown below. The MAC address is on the blue line I have highlighted:
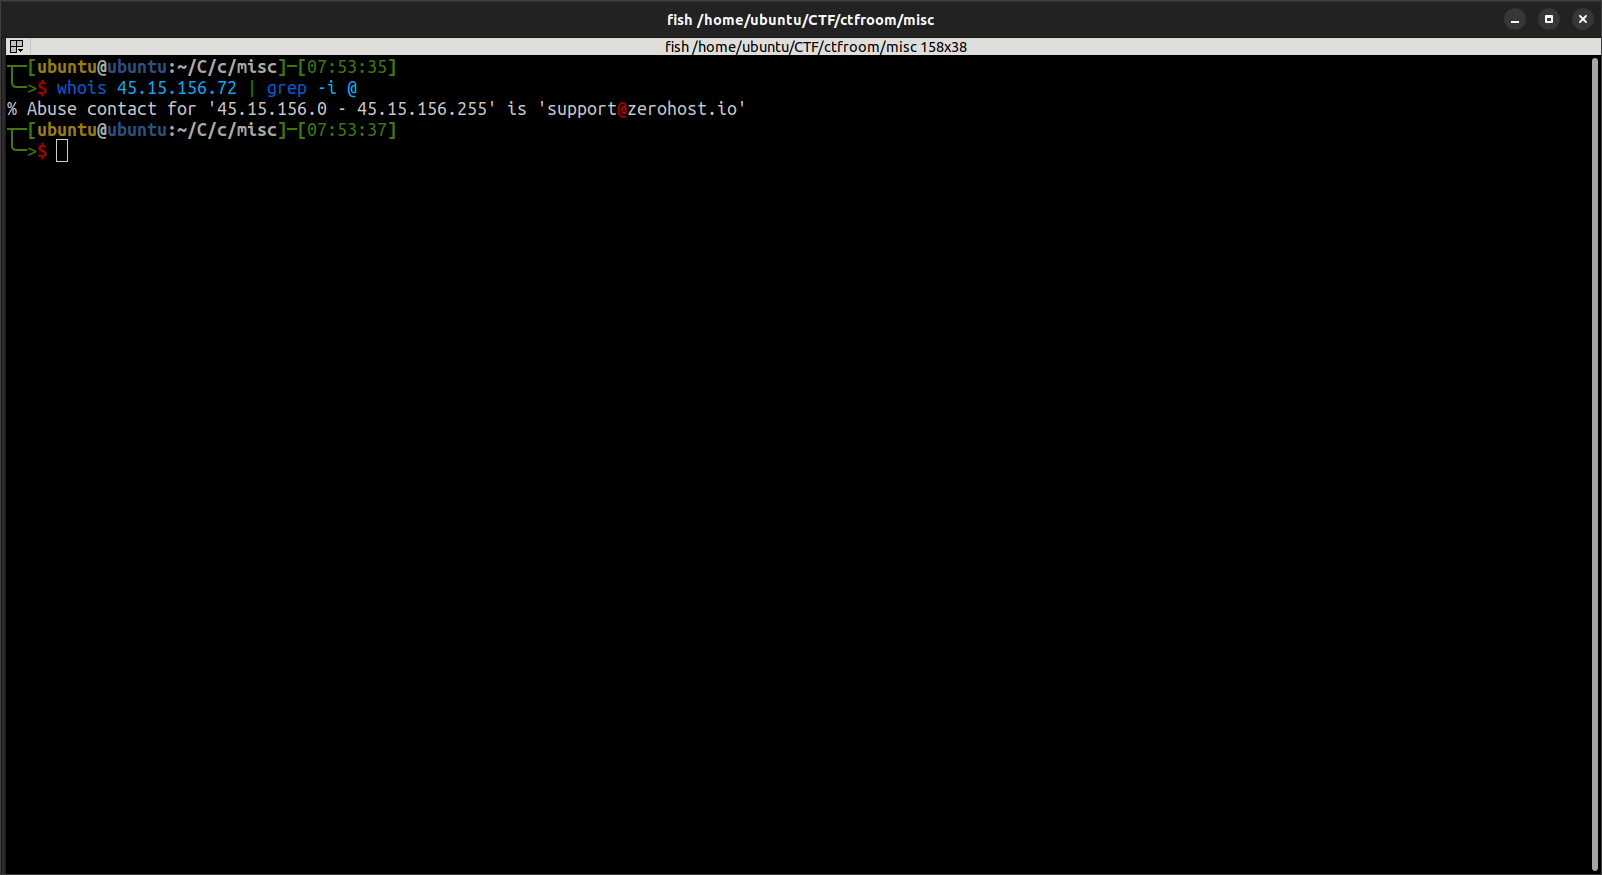
What email address is the registrar of the IP address?
Here we will conduct a WHOIS search on the IP address. To make it even easier, we will combine it with a grep filter for the @ symbol, which is used in email addresses:
DEMO 2
Scrolling through the pcap, you can see weird filenames ending in .ts. I googled this and found out that it is a file extension for video files.
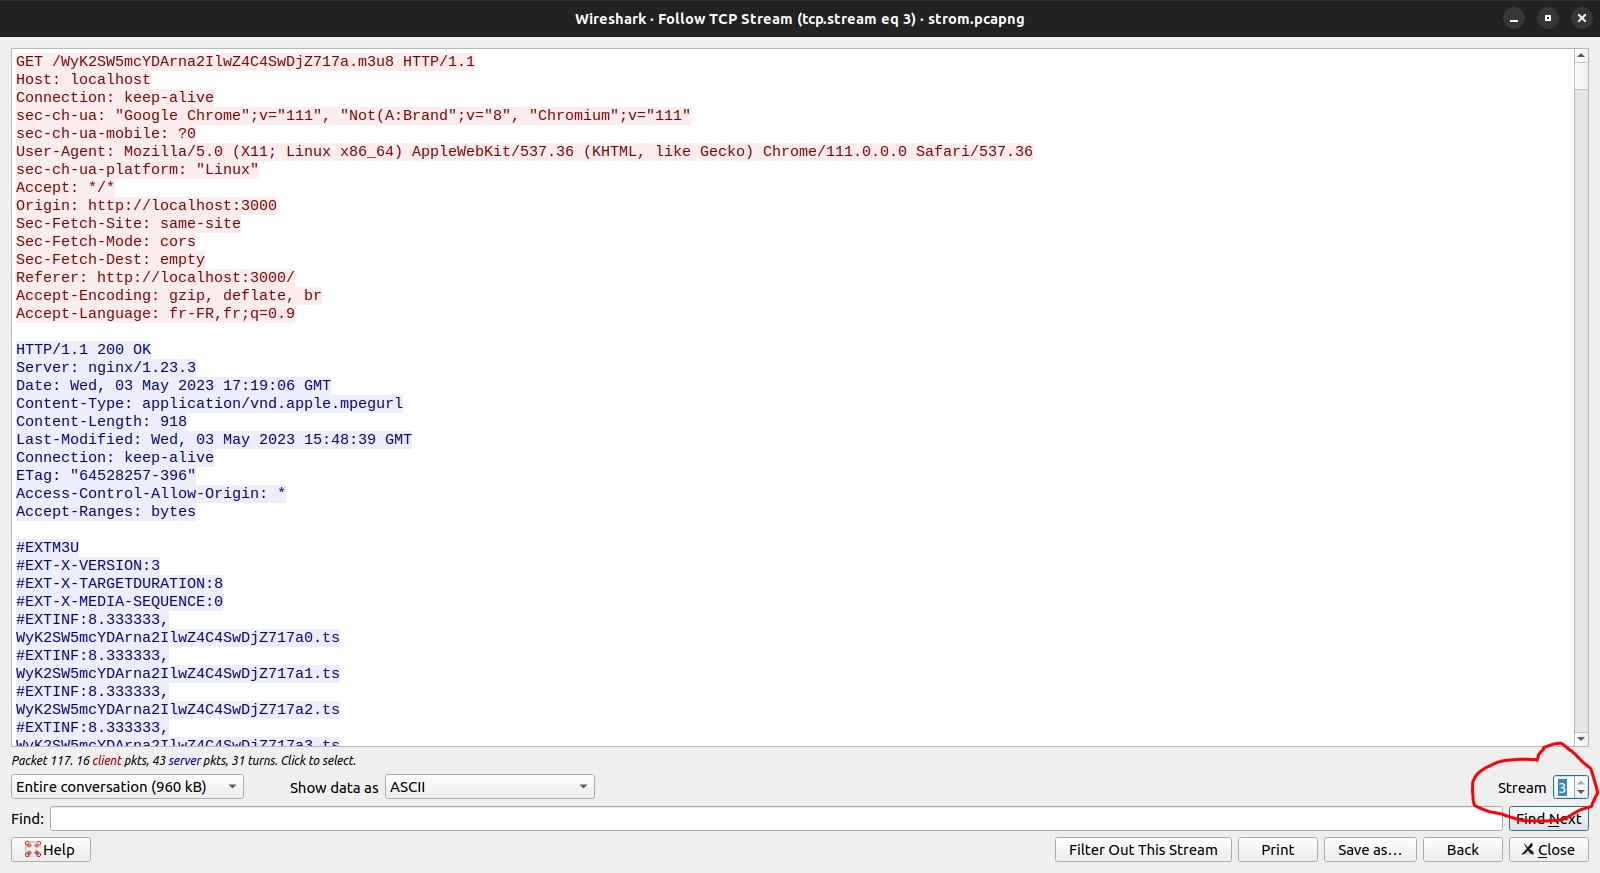
To extract files, you will first have to identify the stream of the files you want to extract. In this case, it’s stream 3. Select packet > right click > follow TCP stream.
You can move through subsequent streams by using the stream buttons:
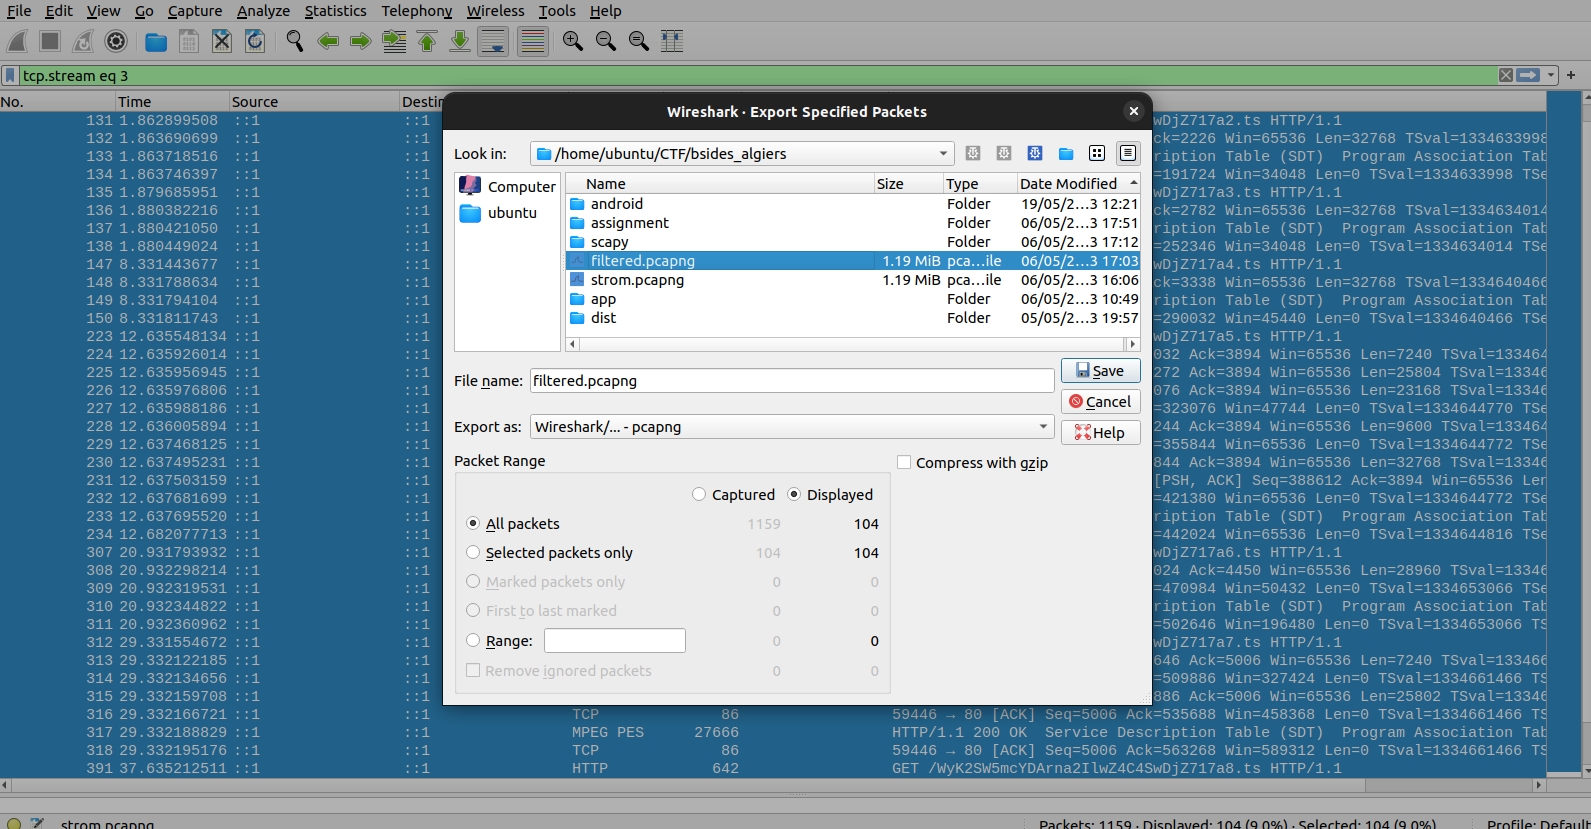
You now have to export the stream to a file. In my case, I called the file filtered.pcapng:
Open the filtered.pcapng in Wireshark. Go to File > Export Objects > HTTP:
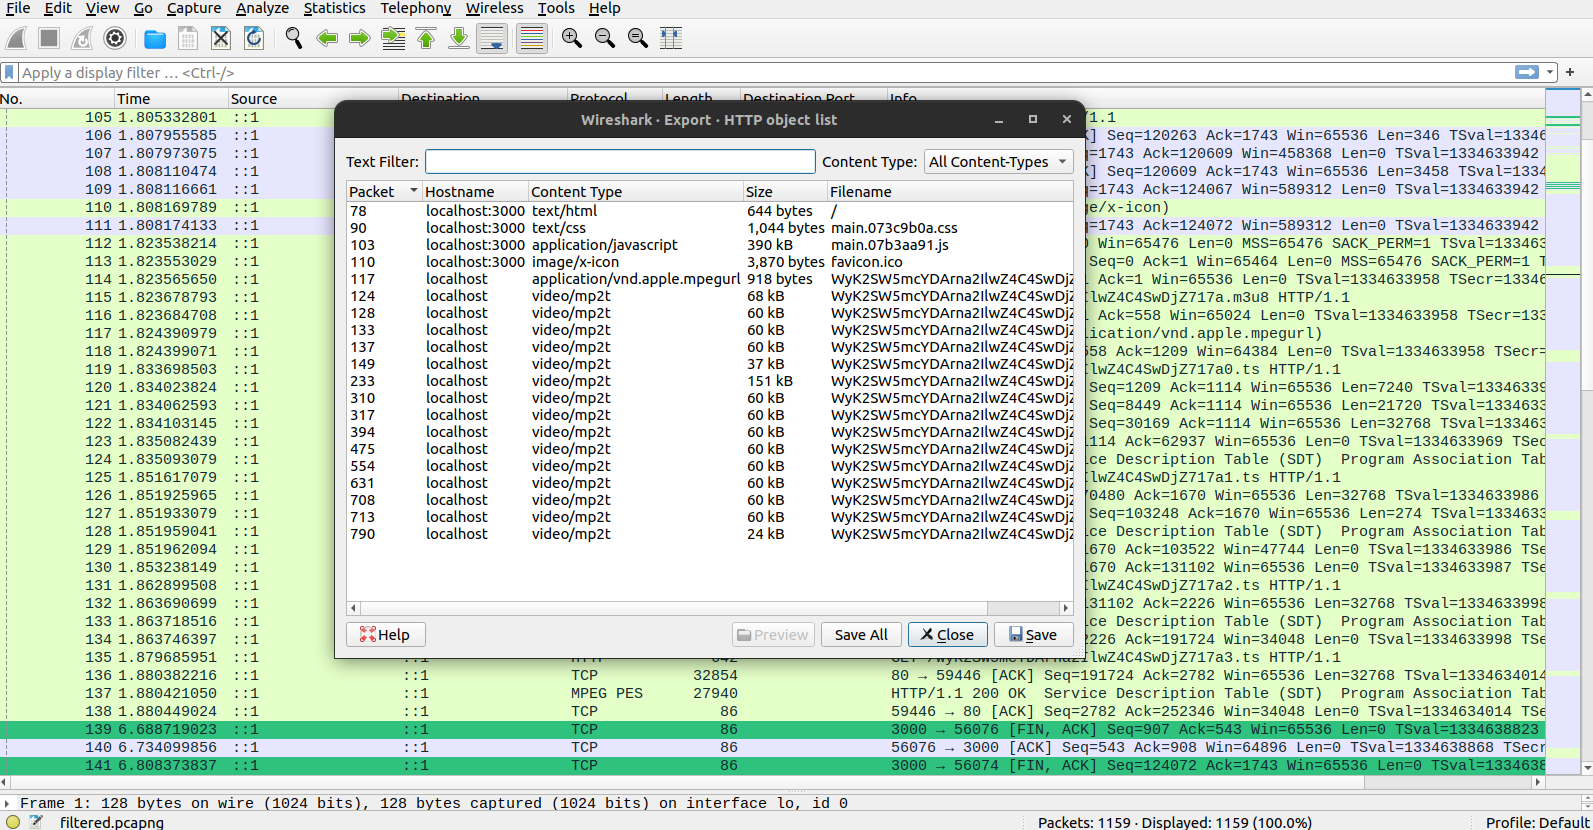
You can click on each and then save. The resulting files can be opened with any video player. The flag is in WyK2SW5mcYDArna2IlwZ4C4SwDjZ717a5.ts.
The above challenges are a good entry to learning to use Wireshark and understanding networking.